It’s that time a year again, and I don’t mean to quote a verse from the holiday song but it just turns out that way. I mean it’s the dreaded ice dam season. If you own an older home and you haven’t set foot in your attic for a decade (or two) then you need to think about adding insulation to your attic to prevent ice dams.
 What is an ice dam?
An ice dam is what forms on the roof where the roof meets the gutters. The main reason they form is because of poor insulation in your attic. Heat from the inside of your home rises and warms the ceiling and when it does that it also warms the attic and therefore warms the roof. Snow that has fallen on the roof begins to melt and runs down your roof and then begins to freeze again over the soffits. The reason the water freezes over the soffits is because the cold air entering your attic at that point freezes the water and the cycle begins. Eventually, as the water collects at the soffit the build up starts to increase rapidly and before you know it, you have a beautiful ice dam that looks like it was formed during prehistoric times. It may look beautiful but it is not a beautiful thing.
Ice dams can damage your roof underlayment causing the roof to leak and will shorten the life span of your shingles. This is not a minor issue and to save yourself a huge expense, properly insulating your attic will not only protect your home but make your home more comfortable in the winter and the summer.
 Here’s how to properly insult your attic.
- Clean your attic! Say this out loud a couple of times because it’s listed at #1 for a reason. I know it’s probably one of the worst jobs for any homeowner to perform but it must be done. Plus, you’ll feel better when it’s done. (At least I did.) It’s much easier to properly insulate your attic if it’s clutter free. You want a layer of smooth insulation throughout the attic.
- Make sure if you’re going to blow insulation in that the lighting you have in your ceiling (if any) is UC rated for contact with insulation. If it’s not UC rated then you need to cover the cans and then insulate around the cans.
- Use roofing baffles at the eaves. These are inexpensive cardboard or plastic baffles that will force the warm air towards the peak of the roof and they staple in easily between the rafters. They are installed with a 2-3″ gap between the cardboard and the roofing underlayment preventing warm air from touching the roof.
- Air Sealing the attic is another important step many people fail to do when insulating their attic. All the holes where wiring
 comes into the attic need to be sealed up nice and tight. Any area where air from the home can enter the attic needs to be sealed. Buy a few cans of Great Stuff and go to town with it.
 - Any storage area in the attic should be in the center of the attic and sit above the insulation. You do not want to lay a piece of plywood down on top of the insulation squishing it flat. Some people suspend a small storage area hanging below and attached to the rafters. This is ideal and the Internet is filled with all kinds of crafty storage ideas for your attic.
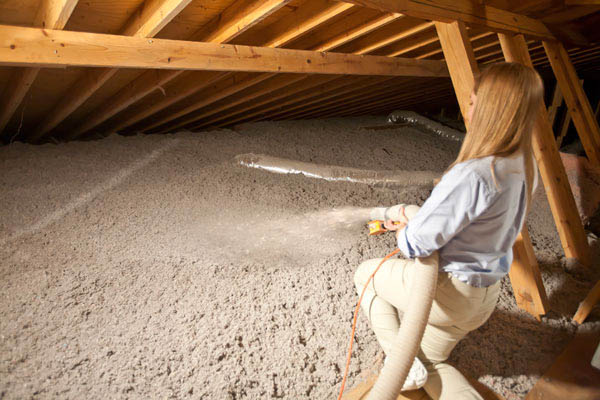
Blown in insulation or Batt Insulation
To be completely honest blown in insulation is the way to go here. Sure, buying batts is a lot less messy and you can take your time and spread the job over a few days or even a week but blowing insulation into your attic is fast, efficient and cost effective. You can rent a machine at Home Depot and buy the insulation there as well. The difference between the two is preparation. When your attic is prepped and ready to go blowing the insulation takes you an hour and then you’re done! The prep is the hardest part. I understand that you still have to prep your attic for batts but this will be a lot less work up front.
Whatever way you decide to go you should congratulate yourself on making the decision to insulate your attic and solve the ice dam problem. And, it will make you feel good knowing you cleaned your attic.
Jim